Easy OAuth 2 mock testing of an ASP.NET Core API
During development I have struggled with testing applications and APIs once authorization was added. The feedback loop gets a lot longer when I have to sign in again, or sign out and in again to switch user, and it is a hassle to get test users with the right roles and claims for each use case.
In this post I use HeyIdentity as a mock IdP for an ASP.NET Core Web API. Configuring test users with exactly the claims I need is easy, and testing with authentication is much faster: I pick a user instead of signing in, and I can switch to another user in seconds. It also means I can test authorization without using my real identity provider.
Full disclosure: I'm developing HeyIdentity. It was created out of my own needs, and feedback is welcome.
Set up the application #
Start with a simple ASP.NET Core Web API with JWT bearer authentication and two endpoints: one for any signed-in user, and one that requires an admin role.
Scaffold the project with PowerShell:
dotnet new web -n MyApi -f net10.0
cd MyApi
dotnet add package Microsoft.AspNetCore.Authentication.JwtBearer --version "10.*"
Replace Program.cs with:
var builder = WebApplication.CreateBuilder(args);

builder.Services
    .AddAuthentication("Bearer")
    .AddJwtBearer(options =>
    {
        builder.Configuration.Bind("Jwt", options);
    });

builder.Services.AddAuthorizationBuilder()
    .AddPolicy("admin_role", policy => policy.RequireRole("admin"));

var app = builder.Build();

app.UseAuthentication();
app.UseAuthorization();

app.MapGet("/me", (HttpContext http) => http.User.Claims.Select(c => new { c.Type, c.Value }))
    .RequireAuthorization();

app.MapGet("/admin", () => "Hello admin")
    .RequireAuthorization("admin_role");

app.Run();
Using HeyIdentity will not introduce special code into the application, e.g. to circumvent the authorization process. It only needs an update to the appsettings.Development.json which we will come to in a short while.
This is a minimal configuration to show the idea, and is NOT production ready.
Configure HeyIdentity #
Configure HeyIdentity manually or use your agent with llms.txt.
Sign up at HeyIdentity and create a configuration. Use the Generic profile, since AddJwtBearer just needs standard OpenID Connect endpoints. Each configuration has its own issuer:
https://app.heyidentity.dev/t/{tenantRouteId}/c/{configurationId}The default setup already has a client demo-client and a default demo-user.
Ensure that an Administrator user is created with the roles claim value admin.
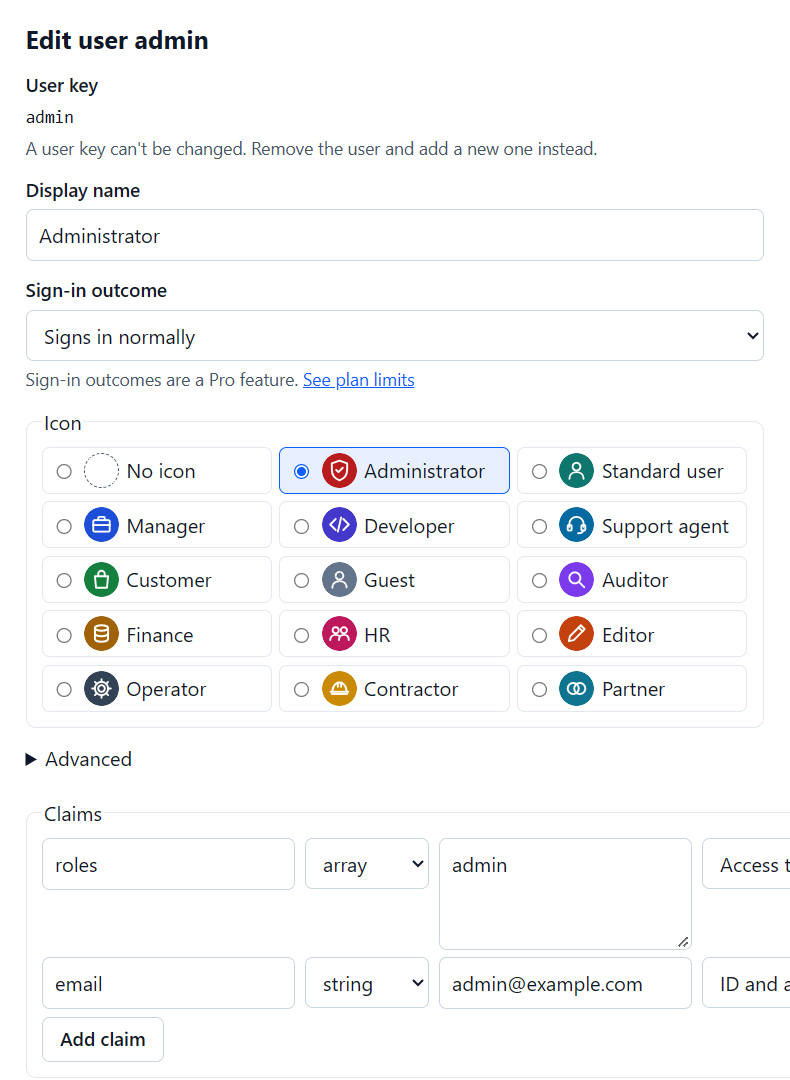
What you will notice is that there is no redirect URI or client secret configured. These can be omitted because HeyIdentity is only for development and testing. The important part is that the flow follows RFC 6749: The OAuth 2.0 Authorization Framework.
Point the API at it #
Set Authority to the issuer of the configuration you created and Audience to demo-client. This is no different from using a different configuration for each environment.
Add the IdP settings to appsettings.Development.json:
{
  "Jwt": {
    "Authority": "https://app.heyidentity.dev/t/{tenantRouteId}/c/{configurationId}",
    "Audience": "demo-client"
  }
}
Get a token and call the API #
The API configured with OAuth 2 does not redirect to a sign-in page. It only returns 401 Unauthorized, so the sign-in must be started from a client. Bruno (or Postman) is a simple way to do that. It has built-in OAuth 2 with PKCE.
Create a request for GET http://localhost:{port}/me in Bruno and open the Auth tab:
- Mode:
OAuth 2.0 - Grant type:
Authorization Code - Authorization URL:
{issuer}/authorize - Access token URL:
{issuer}/token - Client ID:
demo-client - Callback URL: Leave blank, HeyIdentity will accept any in this configuration
- Use PKCE: True
Click Get Access Token, pick a test user on the HeyIdentity page, and Bruno sends the token with the request. Call /me and /admin, then get a new token as the other user and call them again.
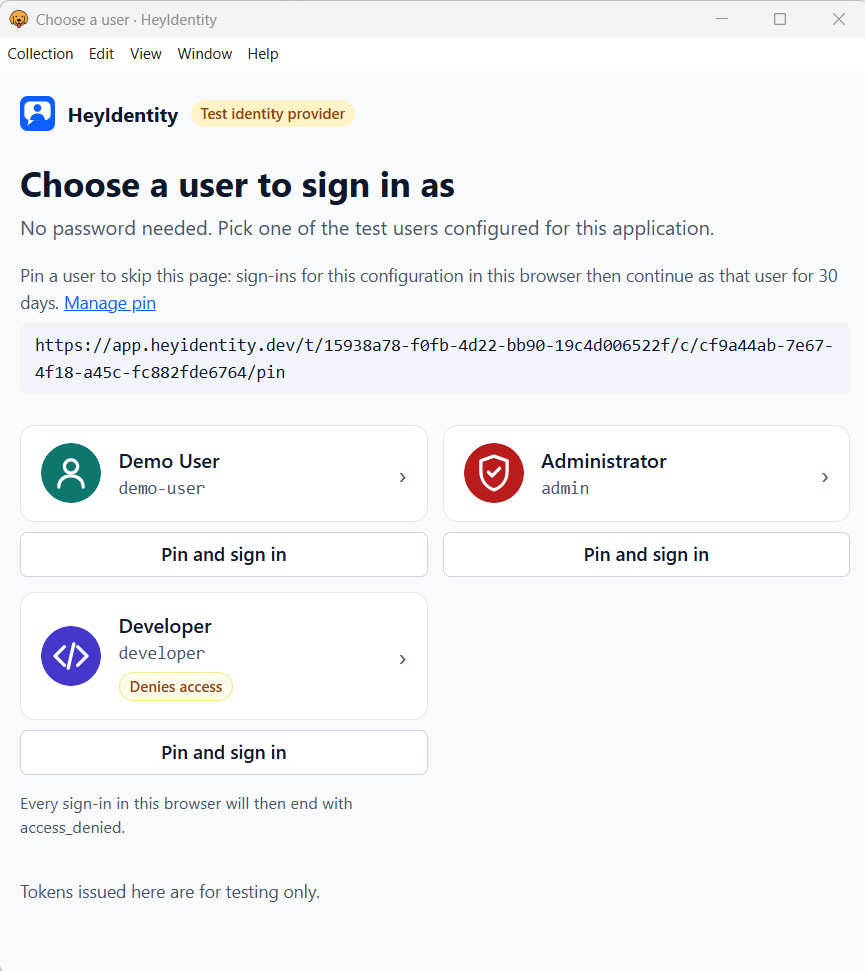
The example here shows 3 users. In addition to the Administrator I have added a Developer with a fault condition. This can be used to test the error handling in the sign-in flow. Additionally, a user can be pinned (a Pro feature) to be used for every subsequent authorization call, skipping the dialog to choose a user.
After authentication as Administrator, a GET request to /me renders the following:
[
  {
    "type": "aud",
    "value": "demo-client"
  },
  {
    "type": "http://schemas.microsoft.com/ws/2008/06/identity/claims/role",
    "value": "admin"
  },
  {
    "type": "http://schemas.xmlsoap.org/ws/2005/05/identity/claims/emailaddress",
    "value": "[email protected]"
  }
  // ...
]
Calling /admin as Demo User results in 403.

As Administrator, the same call renders a clean 200.

Moving to the real IdP #
As the configuration is placed in the appsettings.Development.json it is trivial to set up a real IdP configuration in the appsettings.json or an environment-specific file that targets the real production IdP.
It is important to validate that the actual claims in the tokens match, to ensure that the testing effort matches what will happen in production.
Conclusion #
This post showed how to replace a normal IdP with HeyIdentity to skip passwords (and, even worse, MFA) during local development and testing.